How to Correctly Set Up Mountain Bike Suspension
Table of Contents
- Introduction
- Baseline Settings
- Testing and Tuning
- Light and Heavy Riders
Introduction
Correctly setting up suspension on a mountain bike is widely misunderstood, but it’s actually very manageable once you wrap your head around the core concepts.
The goal is to reach a setup that’s optimized. An optimized setup will make your bike feel balanced and controllable. Secondarily, it will offer the smoothest ride that’s realistically possible. The aim is for your bike to work so well you don’t have to think about it while you’re riding. Simple, right?
There are a handful of steps that should be followed in a specific order to achieve the best possible results quickly. They apply to every bike, every rider, and every style of riding. At a high level, it starts with establishing your baseline settings. That entails:
Set Spring Rate and Sag: Getting the bike set up for the rider Set Rebound: Controlling the return speed of the springs Set Compression: Balancing the bike fore/aft when in motion
Then you test and tune.
There’s more to it and this article goes pretty in depth. Break it into bite size chunks. It will continue to make more sense as you work through the process. Happy tuning 🙂
Setup
This is covered in detail below, but at a glance, setup consists of six steps.
- Adjust all clickers to fully open
- Set Spring Rate
- Measure Sag
- Set Rebound
- Set Compression
- Write Down Your Settings
At its essence, effective setup is about finding a known, repeatable starting point from which to begin tuning. You’ll want to repeat the setup process after swapping in different suspension components or if your weight has changed significantly since the last time you rode.
To establish your baseline settings, you will need:
- A block of uninterrupted time. This should take no longer than 20 minutes for a first timer, and with practice will only take a few minutes
- A current rider weight measurement taken in full riding gear
- A pen and notepad, or notepad app
- An accurate shock pump
- A finely graded ruler or measuring tape. Metric is preferable
- Any tools required to make adjustments to suspension adjusters (if necessary)
- An assistant (not strictly necessary, but extremely helpful for setting sag)
Establishing Your Baseline
Step 1: Adjust All Clickers to Open
Why: This allows for the most accurate sag measurement. Damping does not affect sag, strictly speaking, but it can influence the accuracy of sag measurements, which is a key part of establishing your baseline setting. Given the inherent lack of precision in measuring sag, any confounding influences must be eliminated. Do not skip this step.
How: Identify the “clickers”, or damper adjusters. Turn all adjusters to their fully open position. The will be indicated either by a “minus” sign (-) or, in the case of Rock Shox rebound adjusters, a rabbit. Back the adjusters out gently, one click at a time, until you feel the adjuster stop. It typically feels like a “soft” stop, so when you reach the end, DO NOT force the adjuster any further. Forcing the adjuster can result in damage to the suspension unit. A light touch is all it takes.
Step 2: Set Spring Rate
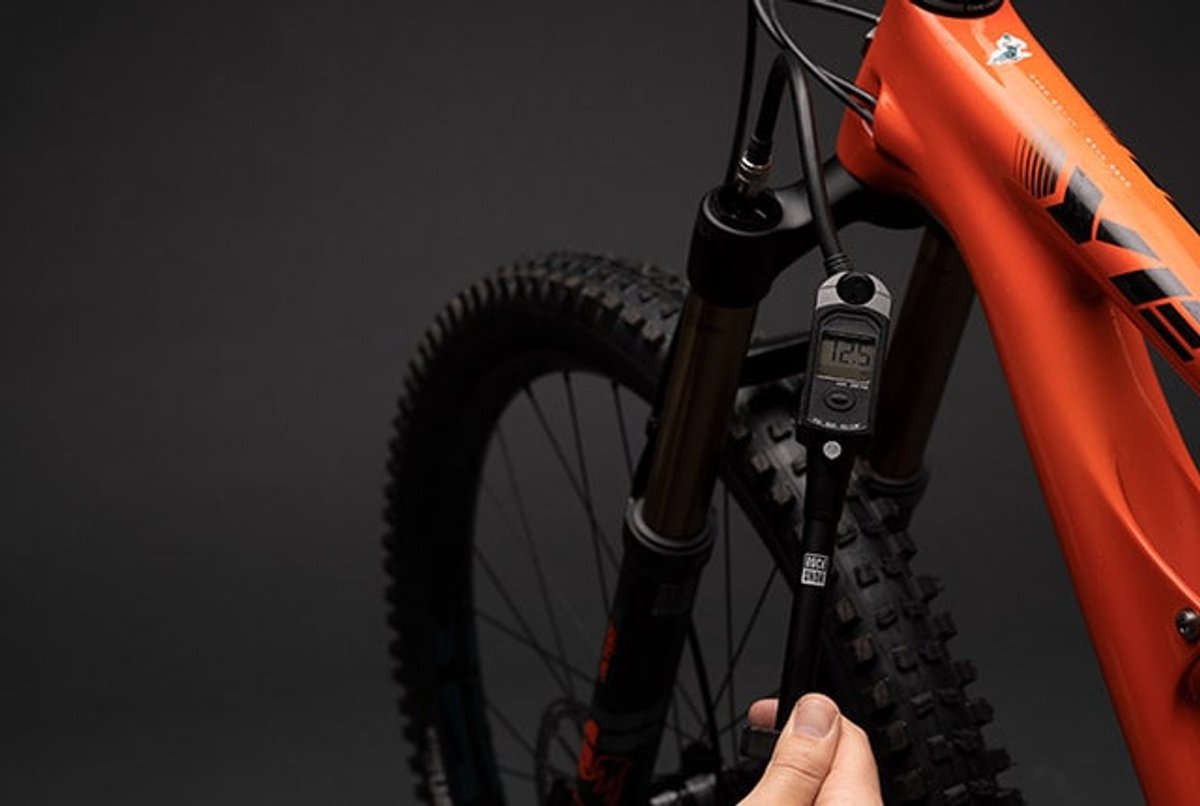
Why: Springs do the vast majority of the work of a suspension system. Springs work by absorbing, storing, and returning energy. In a suspension system, the springs spread the force of an impact over time, which ultimately reduces the peak force transmitted to the bike and the rider.
We start with spring rate for two reasons. The first is that spring rate is a function of rider weight, which means that there is no guesswork involved. The second is that, with a digital shock pump, the spring rate of an air spring can be measured with precision— a standard deviation of less than 1%. Many riders are used to starting with sag, which routinely produces a standard deviation in excess of 20%. Precision is paramount, so we start with spring rate.
Note: Spring rate for air springs is expressed as PSI. Spring rate for coil springs is expressed as pounds-per-inch. From here on, the guide will refer generically to “spring rate”. PSI will be used specifically to refer to air springs.
How: For the rear shock, refer to the frame manufacturer’s setup guide, which can typically be found on the manufacturer’s website. This applies to both air and coil shocks. If you are using an aftermarket shock or cannot find recommended settings, start with your body weight in PSI for an air sprung shock, or refer to an online spring rate calculator for a coil shock. For the fork, refer to the fork manufacturer’s setup guide, which can typically be found printed on a sticker on the fork. Using your shock pump, adjust PSI until the correct measurement is achieved.
As you are inflating your air spring, cycle the suspension unit at 25 lbs increments. This is necessary to balance the positive and negative air chambers. And remember that a small amount of air escapes when the shock pump is disconnected, typically enough to measure 2-3 PSI.
Setup guides will specify a range, not a specific spring rate. This range can be used to tune for feel. The lower end of the range will typically offer a smoother ride. That makes this the right tuning direction for riders who are light on the bike or overall less aggressive. However, going too soft will actually make the ride harsher by causing the bike to settle too deep in its travel, reducing the amount of travel available to deal with impacts. The higher end of the range will offer greater support and bottoming resistance, making it the correct tuning direction for fast descenders, jumpers, and riders who are overall more aggressive.
Step 3: Measure Sag
Why: Sag is critical for correct handling. Full suspension bikes are designed to work within a specific sag range (typically 22%-35% at the rear shock). Running too much or too little sag is detrimental to both suspension feel and pedaling efficiency. However, within the acceptable sag range, sag can be used to fine tune the bike’s handling. Sag is tuned by adjusting spring rate– decreasing spring rate increases sag and vice versa. Riders seeking a livelier, more energetic ride feel will want to run less sag at the rear of the bike. Riders seeking a more planted, stable feel will want to run more sag at the rear of the bike.
Fork sag should be measured with the rider standing in the attack position, as it will produce a more accurate measurement.

Rear shock sag should be measured in both the standing attack position and the seated position with the saddle at full height. Consider the average of those two numbers to be your “effective” sag. This is to ensure that sag falls into an acceptable range for both climbing and descending.
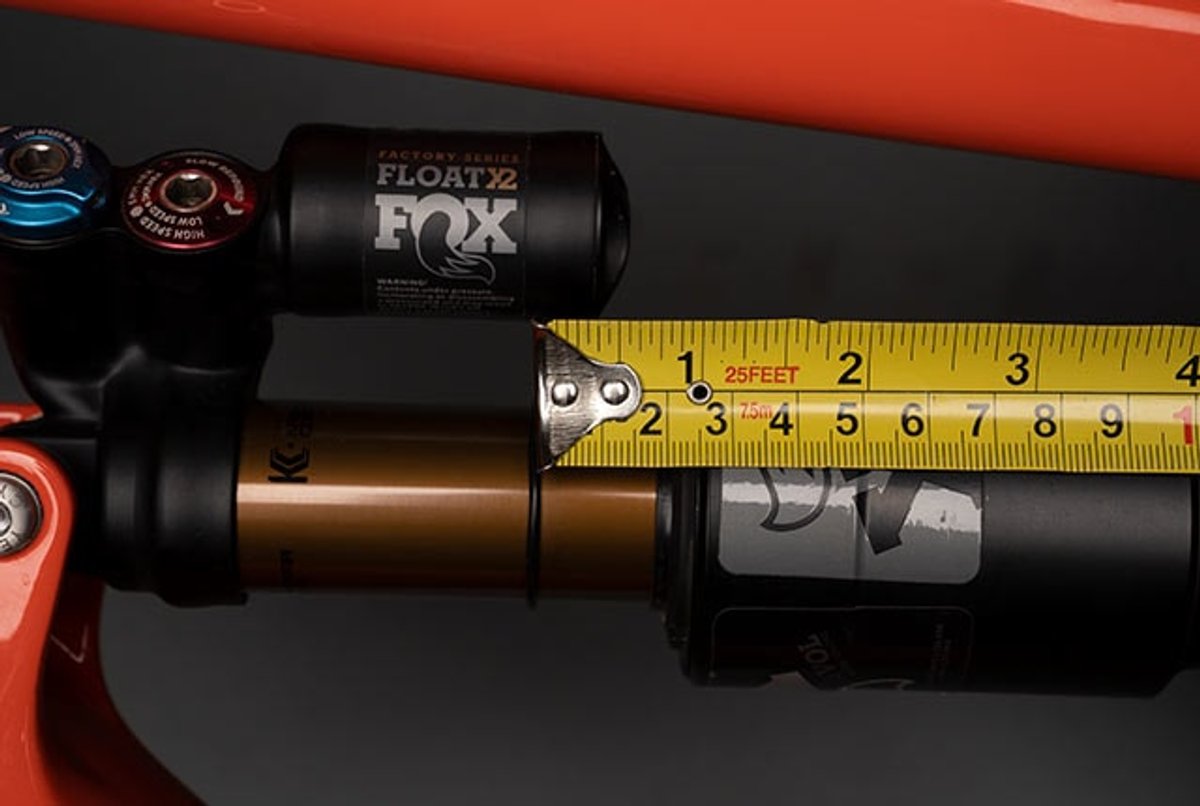
How: Sag is calculated by dividing the travel used by the available stroke (ie. a rear shock with a 60mm stroke that settles 15mm into the stroke measures 25% sag). Mount the bike, preferably in full riding gear, including hydration pack if applicable. Give a couple of good bounces while standing to settle the suspension (this is where an assistant, or a wall, is helpful). Once the suspension has settled, stand up in the attack position. Push the travel indicator O rings located on the fork and rear shock down the stanchion until they contact the seals.
Dismount the bike taking care to not compress the suspension. Measure the distance from the travel indicator O ring to the dust wiper seal at the fork and rear shock, then use that measurement to calculate sag. Repeat this process again for the rear shock, this time adopting a seated position with the saddle at full height. Adjust spring rate as necessary to achieve correct sag measurements.
Step 4: Set Rebound
Why: Rebound damping controls the return speed of the springs. Rebound damping functions by converting a portion of the kinetic energy stored in the compressed spring into heat energy. A rebound damper accomplishes this task via oil flow and the resistance provided by a shim stack inside the damper.
Rebound is a function almost entirely of spring rate, with a small tuning variance for personal taste. Because it is so directly correlated with spring rate, it can be estimated with a great degree of accuracy at this stage of the setup sequence. As spring rate increases, more rebound damping is required to achieve a given rebound speed. More rebound damping (+) means more damping force, which translates into slower rebound.
How: Fork rebound is a function of rear suspension rebound, so focus on rear shock rebound speed first. Bounce on the bike, adding rebound two to three clicks at a time, until you feel the bike returning in a controlled manner. As you add rebound, take note of the point at which the feel transitions from feeling “springy” (ie. like a pogo stick) to being more controlled. At this point, add rebound one click at a time until you’ve achieved the desired feel. When you reach this point, add rebound damping to the fork until it’s extending just slightly faster than the rear end of the bike, without upsetting the fore/aft balance.
SAFETY NOTE: The fork should extend slightly faster than the rear shock. Failure to observe this warning will result in the bike pitching the rider’s weight forward (and potentially over the handlebars), which becomes more pronounced as speed and steepness of terrain increase.
Rebound speed is, to a certain degree, a matter of rider preference. Faster rebound lends the bike a lively, responsive feel and offers faster rolling speed over uneven ground. Too fast, however, and you’ll lose feel for the tires and sacrifice control. makes the bike more predictable,
For suspension units that offer high and low speed rebound, use low speed rebound to tune for overall rebound feel. For high speed rebound settings, refer to the manufacturer’s setup guide. Once high speed rebound is set according to the manufacturer’s guidelines, make adjustments for feel using ONLY the low speed rebound adjuster.
Step 5: Set Compression
Why: Compression damping controls the speed at which suspension moves through its stroke while absorbing energy. Using the same principle as rebound damping, compression damping converts a portion of the kinetic energy imparted into the suspension system and converts it to heat energy.
Compression damping is essential to controlling the bike’s balance when in motion. Balance is achieved by keeping the front and rear suspension working together harmoniously. When one end is compressing too quickly, the balance of the bike is upset in a phenomenon known as “diving”.
Using as little compression damping as possible maximizes rider comfort
As you may recall from physics, kinetic energy is calculated by squaring half of mass times velocity. That means that the faster a given object is traveling, the more kinetic energy is at play, and the amount of kinetic energy grows exponentially with speed. Or put simply, the faster you go, the harder you hit things. As a result, heavier riders and fast descenders will need more compression damping to achieve a controlled suspension feel, while lighter riders and more cautious descenders will benefit from using less compression damping.
That’s also why many professional racers have a firmer, more controlled “race baseline”, as well as a softer, more comfortable “everyday baseline”. A setup that offers sufficient support for riding flat out on a race track will often be uncomfortably firm, or sub-optimal at the comparatively slower speeds of day to day trail riding. That’s no less true for the world’s best as it is for a racer at any level.
In most modern mountain bike dampers, compression damping is split between “high speed compression” and “low speed compression” circuits, although many suspension units have a fixed, non-adjustable high speed compression setting. High and low speed are references to “shaft speed”, or the velocity at which the suspension unit is compressing. That’s NOT the same as the speed at which the rider is traveling. High shaft speeds generally occur when hitting objects on the trail, while low shaft speeds occur when the rider is loading the bike, as in corners or g-outs.
Add low speed compression damping to adjust the fore/aft balance of the bike under compression. It’s generally advisable to leave high speed compression fully open until the testing and tuning phase.
Note: Most suspension components only offer external adjustments for low speed compression damping, and the adjustments will not always be marked as such. Fox’s FIT4 adjuster, for example, is a low speed compression adjuster. Unless the suspension unit in question offers adjusters marked specifically as high speed compression and low speed compression, assume that your external compression damping adjustment affects low speed compression damping.
How: Start by bouncing on the bike while riding around, and pay attention to the way that both ends of the bike are compressing. Both ends of the bike should compress at essentially the same speed. If one end of the bike seems to be compressing faster or much more freely than the other end, add low speed compression at that end of the bike until balance is achieved. Stop there. Further tuning of compression settings will be conducted on the trail.
Step 6: Note Your Settings
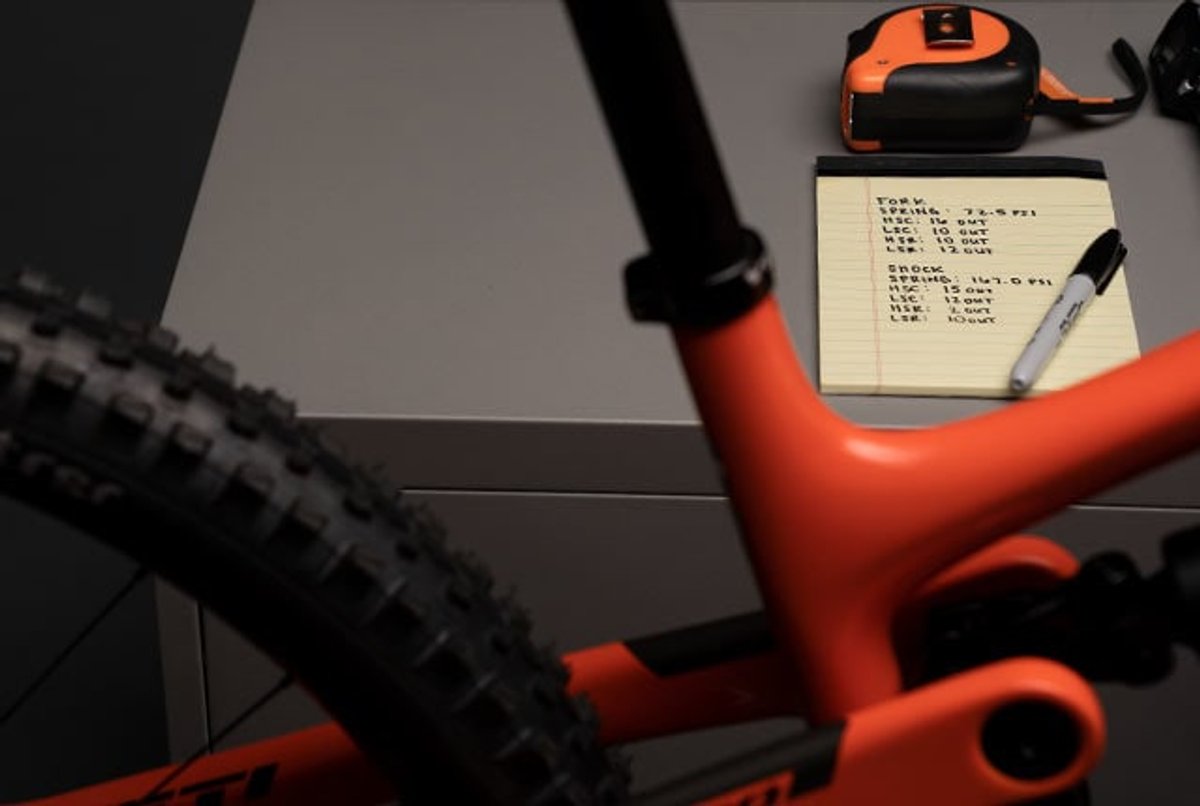
Why: At this point, you will have arrived at your baseline setting. Making note of each setting gives you a known reference point.
Damper adjustments are measured in “clicks out” from “closed”, or maximum damping value. This is to ensure the most precise starting point for each measurement. The benefit of this approach is that it ensures that your baseline will not change if your suspension damper is rebuilt. This is a technicality that has minimal impact on the average rider, but precision is paramount and “clicks out” from closed is more precise than “clicks in” from open.
How: Once you are satisfied with your baseline setting, measure your spring rate front and rear, plus all clicker settings, writing each setting in your notes. Keep your notes at hand when you begin the testing and tuning phase. Make a note of each and every adjustment made during testing and tuning, as well as your subjective assessment of the impact of each adjustment.
Testing and Tuning
Testing and tuning means riding with the goal of critiquing and improving your setup.
The goal is first to achieve fore/aft balance, then to pursue the smoothest ride possible.
The ideal test location is a section of trail that offers a variety of features that are representative of your local riding, and that you can lap quickly and easily.
Effective suspension tuning requires changing a single parameter at a time and testing the results of that change. This is necessary to isolate variables, which in turn makes the process as exact as possible. Don’t be afraid to make changes and experiment with what works for you. Just make sure to note any changes made, and never change more than one parameter at a time.

Ride the test lap before making any changes, paying attention to the bike’s overall behavior, as well as any issues that need to be addressed. If multiple issues are present, start by identifying the issue which is most pronounced, or has the largest impact on your control and comfort. Address issues in decreasing order of impact.
Utilizing what you’ve learned, select the adjuster best suited to dealing with the particular issue in question. If you feel that you are a ways off, make adjustments two to three clicks at a time. If you feel that you are close, make adjustments one click at a time.
It’s quite possible that your bike will already be working well enough that you can’t identify any necessary changes. In that case, your work is done, at least for now. Your optimal suspension setup will likely evolve throughout the season, so keep that in mind as you get fitter, faster, and more comfortable on your bike.
Troubleshooting
On trail testing will reveal the shortcomings of your baseline settings. Those shortcomings will manifest themselves through a handful of undesirable traits. In no particular order, the common ones are:
Harshness What: The bike doesn’t track the ground smoothly
First Corrective Action: Increase Rebound Speed
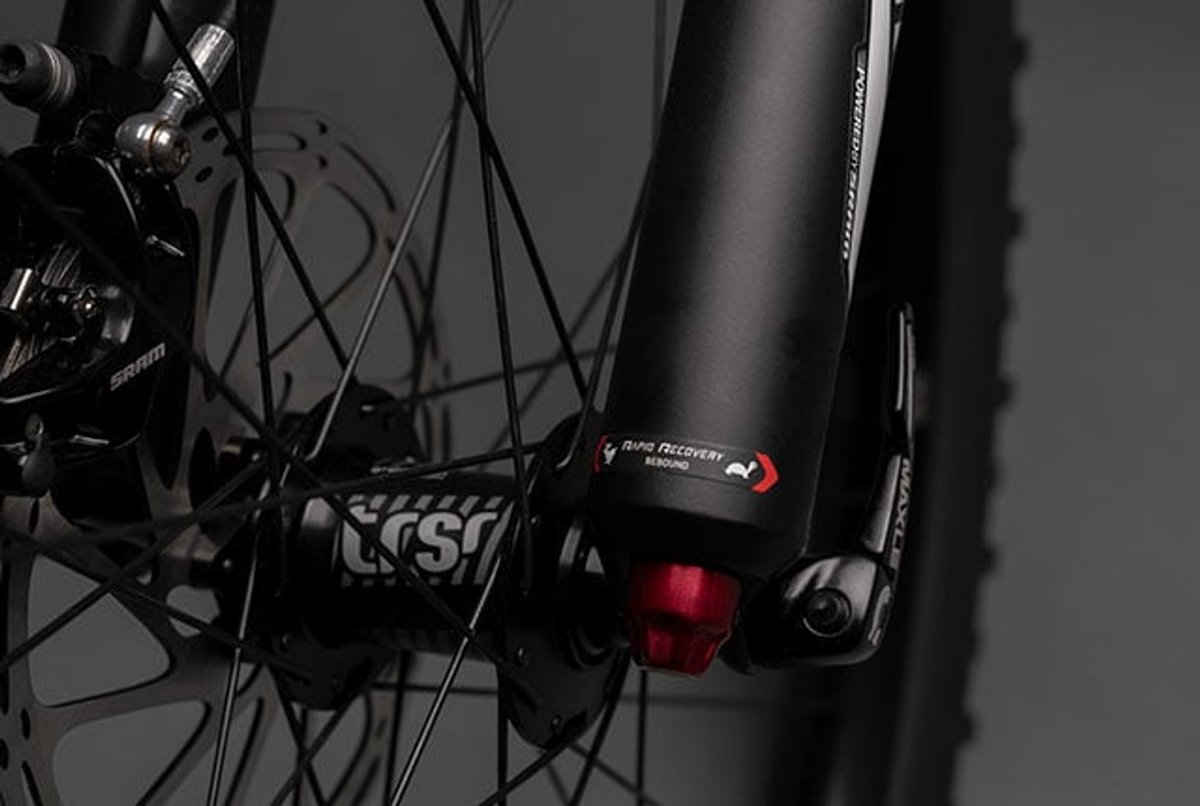
The most common cause of harshness is using too much rebound damping. When the suspension can’t extend quickly enough, it will settle deeper into the travel, reducing the amount of travel available to attenuate impacts. Decrease rebound damping one click at a time until the problem is resolved, taking care to keep the fork extending faster than the rear shock.
Second Corrective Action: Reduce Compression Damping
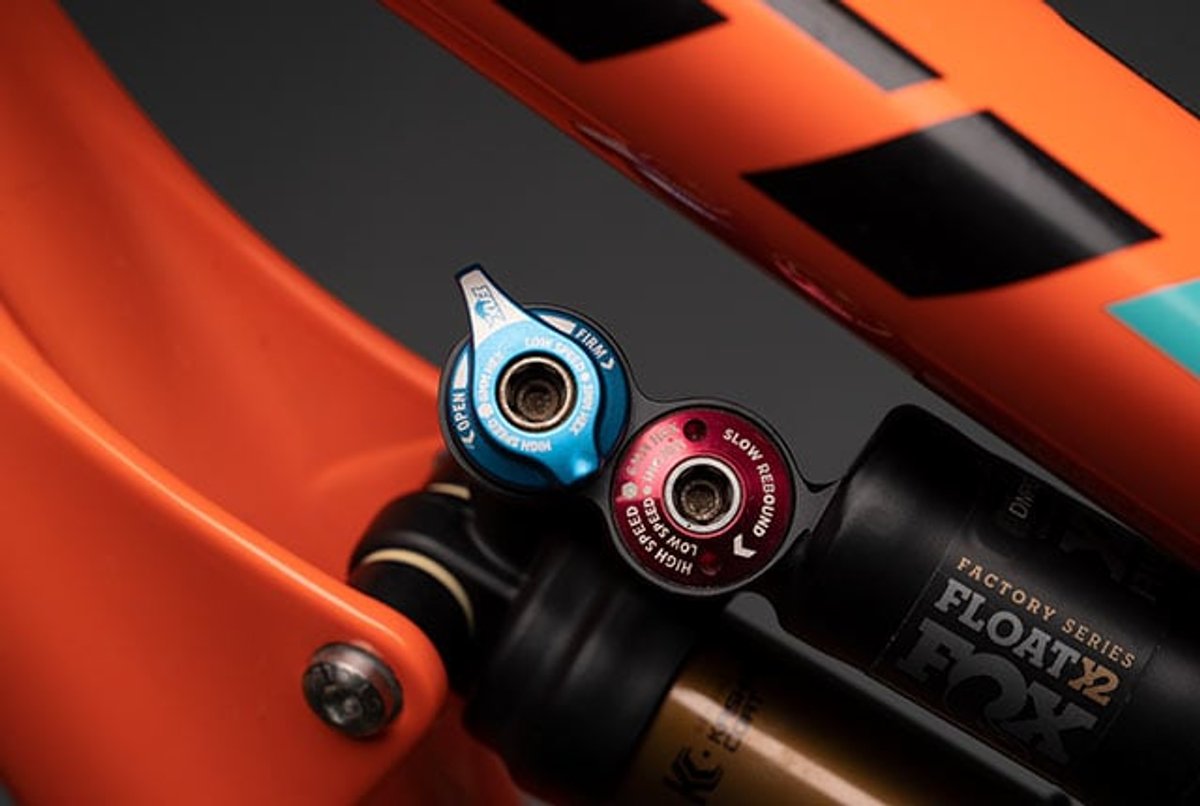
Compression damping provides support. Support comes at the expense of comfort, especially at slower speeds. The rider will sometimes experience this as harshness. Reduce low speed compression damping one click at a time until the problem is resolved.
Third Corrective Action: Service Suspension
Suspension requires service at regular intervals. Excess friction is one of the common side effects of a suspension unit being overdue for service. Excess friction can result in harshness. In this case, have your suspension serviced by a certified suspension center.
Not Achieving Full Travel
What: In certain situations, especially for lighter or smoother riders, you may be unable to achieve full travel when desired (ie. drops with a jarring landing). More aggressive riders may prefer that their fork never or rarely achieve full travel, leaving a few millimeters of travel in reserve.
First Corrective Action: “Burp” Air from Lowers (Fork Only)
What: Under normal use, air will build up in the lowers of the fork, and that air will act as a spring, effectively increasing your overall spring rate. Using a plastic zip tie, slide the tip under the lip of the dust wiper and past the fork’s oil seal, or about three inches. The sound of air escaping indicates success. Repeat this step for both fork stanchions.
Second Corrective Action: Reduce Spring Rate
Reduce spring rate 3%-5% at a time until full travel or a desirable suspension feel is achieved.
Third Corrective Action: Remove Volume Reducers
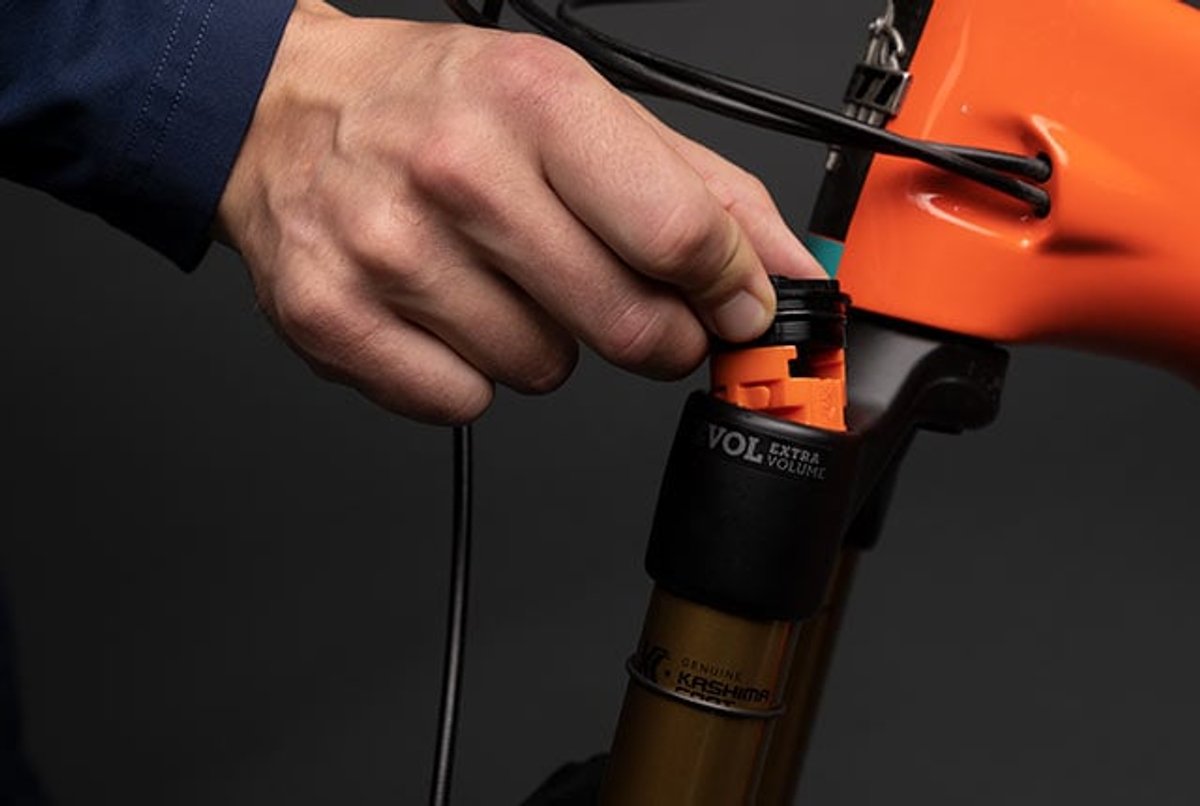
Most suspension units come with a certain number of volume reducers installed from the factory. Lighter riders will want to remove volume reducers, preferably one at a time, until full travel is achieved.
Bottoming Out
What: Bottoming out is when your suspension uses full travel. Using full travel is not necessarily a problem, especially when it happens only occasionally. What you’re looking to avoid is “hard bottoming”, or using full travel, as indicated by the travel indicator O rings, AND feeling a jarring impact when full travel is achieved. Make sure to check the travel indicator O rings, as bottoming the tire on the rim can produce a similar feel to hard bottoming of suspension. Common situations that result in hard bottoming would be landing drops or jumps, or when hitting square edged impacts on the trail.
First Corrective Action: Add High Speed Compression Damping
If your suspension unit offers high speed compression adjustment, add high speed compression damping until problem is resolved.
Second Corrective Action: Increase Spring Rate
Increase spring rate in 3%-5% increments until problem is resolved.
Third Corrective Action: Add Volume Reducers
Volume reducers are used in air spring-based suspension units to tune the spring’s behavior as the suspension unit approaches full travel. Essentially, adding volume spacers mimics a stiffer spring rate deeper in the stroke, which makes them an invaluable asset for fine tuning bottoming resistance, and makes their use particularly relevant to more aggressive riders. At the risk of oversimplifying, they are used to tune only the last third of the stroke, and will have little if any impact on the first two thirds of available suspension travel. Add volume reducers one at a time until undesirable bottoming is resolved.
Lack of Tire Feel What: You feel disconnected from what the tires are doing. The sensation of traction is unusually vague.
Corrective Action: Add Rebound Damping
Running your rebound damping too fast results in the suspension effectively pushing the bike away from the ground. Add rebound damping one click at a time, taking care to ensure fork is extending faster than the rear suspension.
Adjusters Not Working
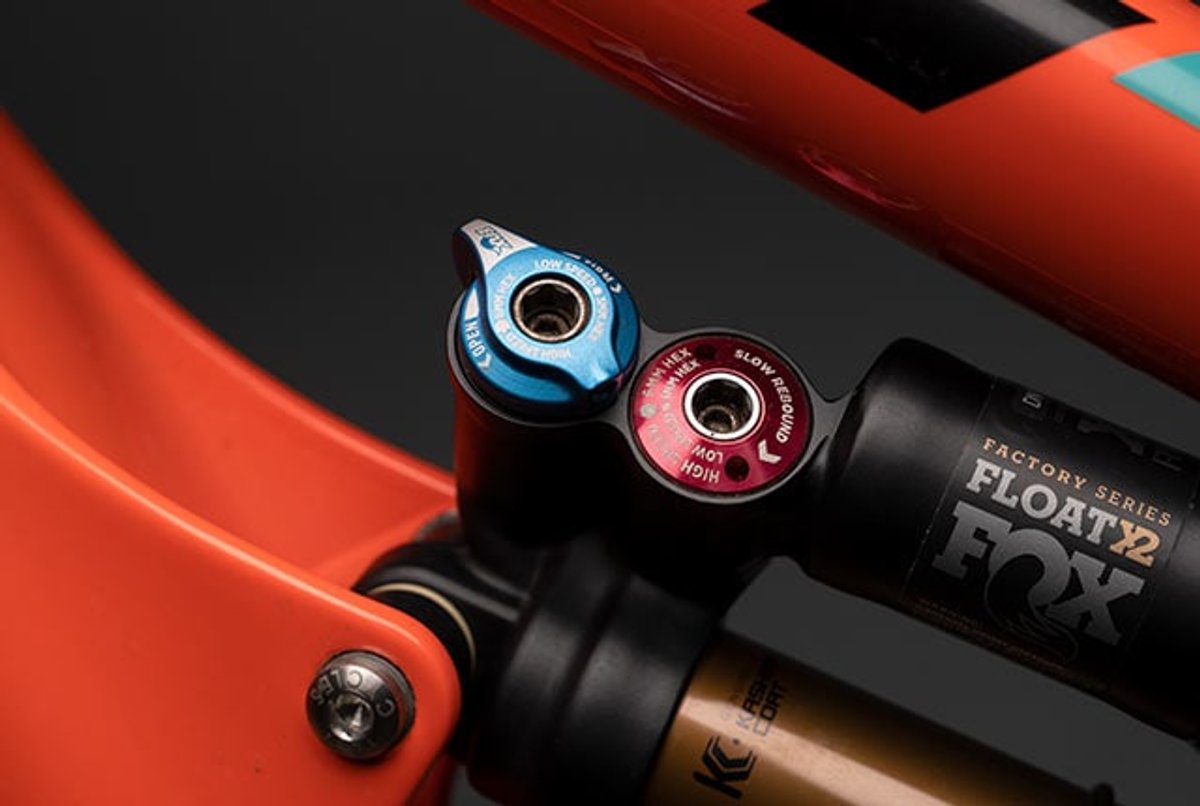
What: Damper adjusters are not having a noticeable impact on suspension feel.
Corrective Action: Test Adjusters
Adjust damper in question to full closed setting, then bounce on the bike a few times to test for feel. Adjust damper to full open setting, and repeat this process.
If there is no perceivable change in damping force, take suspension for service by an authorized suspension service center.
If there is a perceivable change in damping force but the range of damping adjustment is exceeded before a desirable feel is achieved (ie. the adjuster is either fully closed or fully open, and you find yourself needing “more clicks”) consult an authorized suspension service center regarding a revalve, or internal modifications to your damper settings. The common causes for the need to revalve are addressed the following section.
Tuning for Light or Heavy Riders Suspension components are built with an “average” rider in mind. As a result, riders who fall outside of this “average” range, either due to weight or speed, may find that stock suspension components fail to offer a wide enough range of adjustments to cover their needs. If you weigh less than 135 lbs or more than 235 lbs, it is likely that additional modifications will be required to achieve an optimal suspension setup. These modifications should be performed by the suspension component manufacturer or by a reputable suspension service center that’s authorized by the component manufacturer.
Light Riders
Riders weighing under about 135 lbs will tend to find stock suspension to be “overdamped”. The exception is riders on “female specific” bikes, which typically come stock with a designated “light rider” tune.
The symptom of this problem is that their adjusters will be turned all the way “out”, and the rider will still need more range of adjustment. For a few reasons, this problem tends to be more pronounced on longer travel bikes.
There are two approaches to addressing this issue. The best approach is to revalve front and rear suspension for reduced damping force. This service will only be available through an authorized suspension service center. Keep in mind that the majority of shops are not equipped to perform revalve services.
The more common alternative, which might be considered a “hack” is to replace the suspension oil in the damper with a lighter, more viscous suspension oil, which yields reduced damping force without altering the shim stack that dictates the overall damping profile. This approach is much more common and will generally produce satisfactory results.
Heavy Riders
Riders weighing over about 235 lbs will run into the opposite of the issue experienced by light riders, namely that stock suspension dampers will often fail to provide sufficient damping force, even with the adjusters “fully closed”. If testing indicates that this is the case, the correct course of action is to pursue a revalve of your suspension components from an authorized suspension service center.
Unlike light riders, heavy riders will NOT want to simply replace the suspension oil in their dampers with a different weight (heavier, or less viscous, in this case) suspension oil. Changing to a less viscous oil can result in the damper’s inability to flow a sufficient amount of oil, which restricts the suspension unit’s ability to absorb energy. This condition is known as “spiking”, and results in rider discomfort and impaired traction. The only acceptable remedy for too little damping force is to have your suspension revalved.
Heavier riders also experience more friction and accelerated wear of suspension components, leading to reduced service life between maintenance intervals. This can be mitigated to a certain degree by choosing heavy duty suspension components, especially forks with larger stanchions, but cannot be entirely eliminated. By being mindful of, and staying on top of the accelerated maintenance intervals, you’ll find that your suspension continues to provide admirable service over the long run.
In Closing
It would be misleading to claim that suspension setup is simple or easy, and like any discipline, true mastery is elusive. However, suspension setup is guided by principles allow the average tuner to achieve exceptional results. Take your time, pay attention to the details, take plenty of notes, and you’ll be rewarded with the very best on-trail experience which your bike is capable of delivering.